Today is a good day. Or is it goodies day? Well, I would say BOTH!
I received a donation of a lot of stuff that was just accumulating dust in some loft. In the package, was a PowerMac 6100/60 with it monitor, an Apple Stylewriter 2400 printer, a SCSI flatbed scanner and a SCSI Zip Drive. Previous owner said that it was all working before he put them away, long ago.
As always, with machines that old, chances are internal battery leaked and corroded vital parts of the motherboard. So, even before attempting to open it up (even though it is a breeze to open up a 6100 Mac), I wanted to test it. I was dying to test it, actually.
In this video, I show you the unboxing of everything and the PowerMac test. Later on, I will come up with some videos showing the cleaning up and refurbishing of the equipment. Haven’t tested the Zip Drive and printer yet. I need to clean them up first. Don’t want to risk having the dust going deeper inside if I try to see if they work ?
In this video I show an attempt to repair an external Macintosh M0130 floppy drive I bought at eBay for £30. Seller sold this as for parts or not working as he said he was unable to test it – not unusual, as you would need a very old Macintosh to plug this in.
My hope was that the drive would be fully functional upon arrival, but for my disappointment, it wasn’t. Floppy disks wouldn’t get into the drive easily (I had to push them hard to get them in), and it wouldn’t eject the inserted disks afterwards. Needless to say it wasn’t reading the disks either.
So, I was determined to attempt a refurbish to this drive, as I do have a spare internal floppy removed from a non-working Mac SE that I thought it could work as a donor to this project. In the end, I didn’t have to try the “transplant” as the old drive did work after some hard cleaning and lubing works.
The SCSI2SD solution allows you to replace old SCSI hard drives with modern SD cards. It is almost a must-have piece of technology to everyone who is into collecting vintage computers (specially old Macs). The reason is simple: It is virtually impossible to find a reliable SCSI hard drive nowadays (I mean, old-school SCSI drives, not modern ones). And even if you can find a working one at a decent price tag, it will most certainly die after a couple of years anyways, as those disks have been around for decades.
I have been using the SCSI2SD solution for a while, now. Have applied to vintage Mac notebooks, to Mac desktops (such as the PowerMac 6100/60 DOS Compatible I have) and I have even used it on a NeXT Station I had in the past. It just works!
One of the best things about those little boards is that it doesn’t require external power to function. It can draw power directly from the SCSI power termination pin, which makes it an amazing solution for an external SCSI drive!
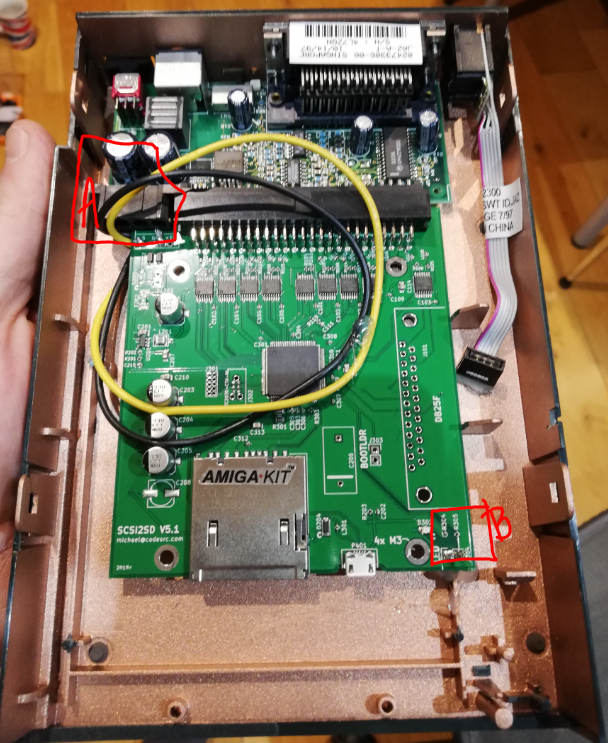
If you never saw one, below is a picture of a SCSI2SD card (v5.1 depicted, which is the version I have)
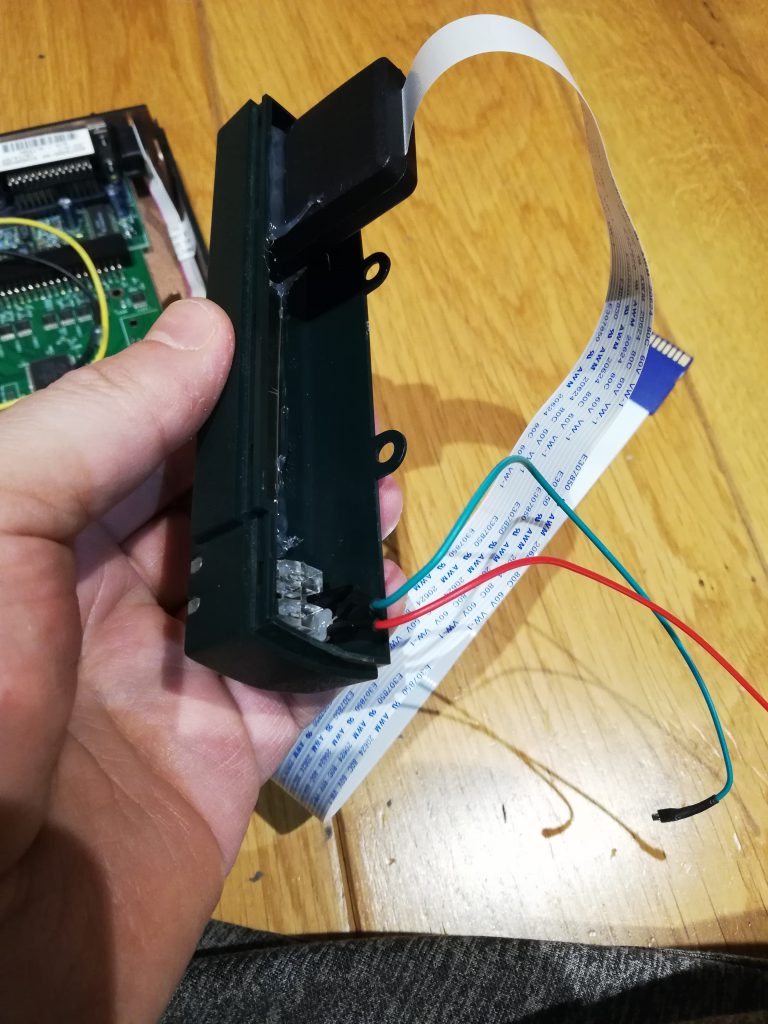
In my case, to add it to the case of a SCSI Jaz drive, I had to disolder the 4 pin power connector, as if I didn’t, it wouldn’t fit the case (see below). I then soldered a pair of wires to the 5v / GND coming from the Jaz board on to the SCSI2SD board (yellow and brown wires in the below picture). See that the picture shows the power connector on the SCSI2SD board removed (“A”). I also soldered a LED on the “B” highlighted part (J304), so that the Jaz drive case would light up upon being powered.
The initial idea was to add a SD extender to the project, adding the SD case to the front of the Jaz drive, for easy SD card swapping. That didn’t work as expected because, for some reason, the SCSI2SD board did not like the SD extender. So, I gave it up and removed the extender.
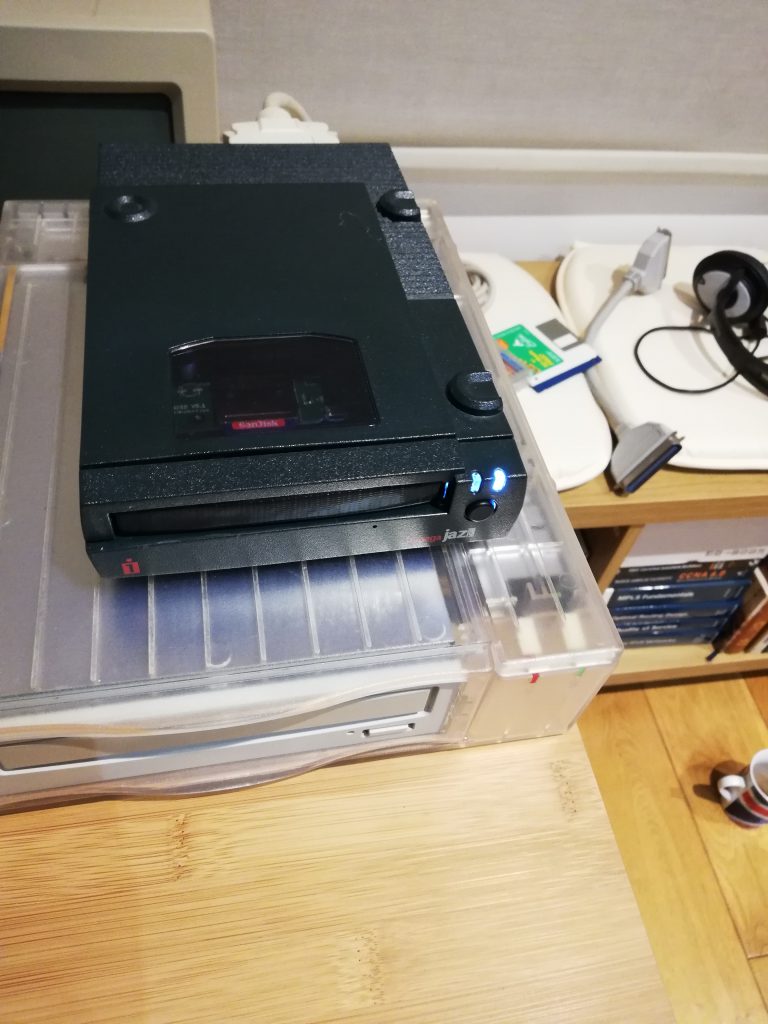
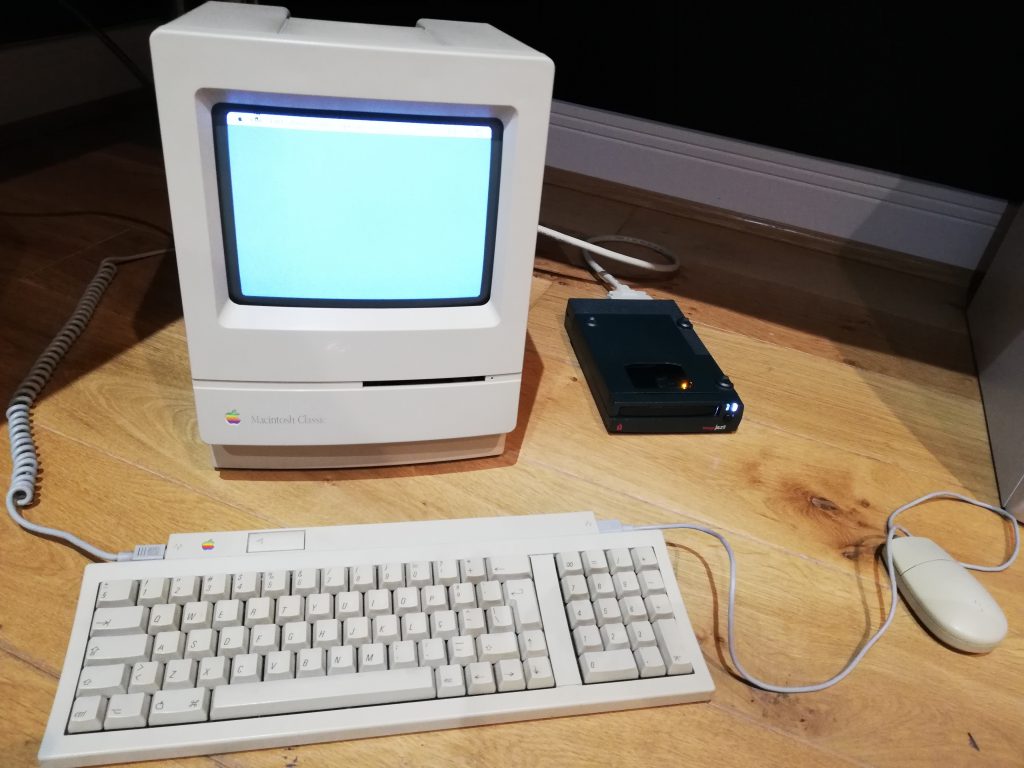
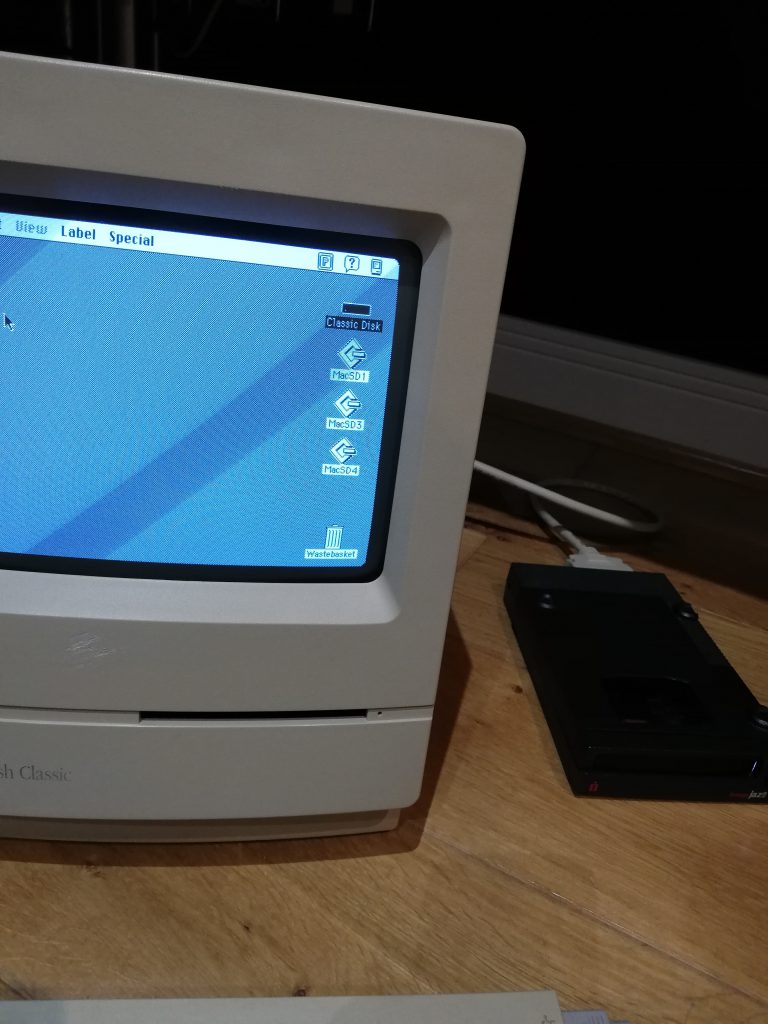
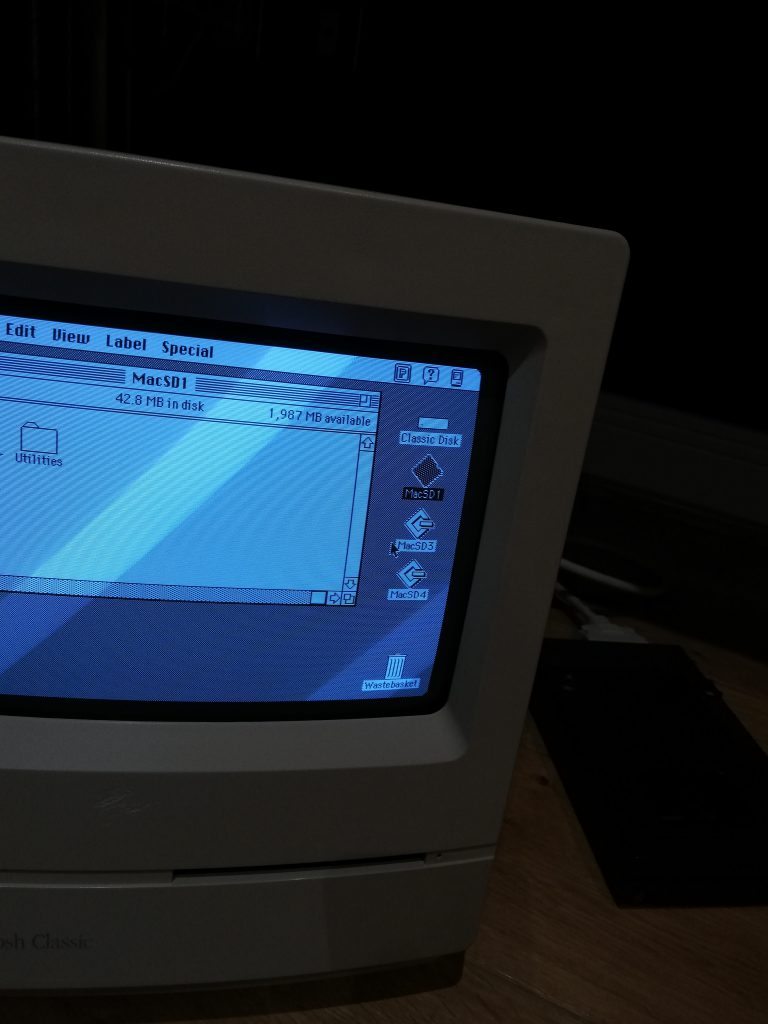
After assembling everything and trying it out on a Macintosh Classic, it worked like magic! I used an 8GB SD card and Lido to create the 4 2GB volumes (as older versions of System 7 can’t deal with more than that). I also had to configure the SCSI2SD to present the SD card as 4 2GB SCSI volumes, instead of a single 8GB SCSI disk. This is easily achieved using the SCSI2SD utility downloadable from their website. Below you can see the final result. Note that NO POWER SUPPLY is needed to get this to work! It draws power directly from the SCSI termination power pin.
I tested the solution on 3 different Macs I own: The 6100/60, the PowerBook duo 230 (connected to the docking bay) and the Macintosh Classic. In all of them, it worked flawlessly. I just connect the drive to the SCSI port and all the 4 volumes are detected.
The only drawback was with my Mac Plus. Since the SCSI architecture on the Plus is different than all other Macs, the Plus is VERY picky when it comes to SCSI peripherals. I was able to get my Zip Drive to work with it (after a LOT of work), but I couldn’t get this external SCSI2SD to go along with it. For starters, the Mac Plus DOES NOT provide termination power. But even with an external power supply attached to the Jaz case I could not get it to be seen by the Plus.
EDIT: I got it to work with the Mac Plus. It required some additional work, but it finally worked. You can see the post here!
I have created a small video showing the solution. Hope you enjoy it!
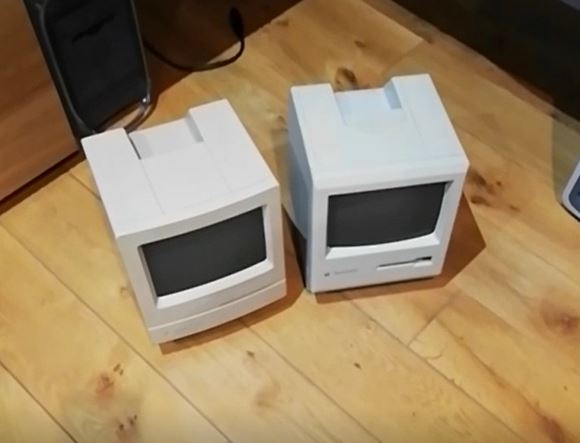
I’ve bought those 2 Macintoshes from eBay, a Classic and a Plus. Both were sold as non-working. Testing them further, I realised the Plus was just in need of new caps. The Classic, well… this guy was busted. Bad CRT, both boards in really bad shape, non-working floppy and hard drive… a disaster. BUT – the case was in really good shape as it can be seen below (left, the Classic, right, the Plus).
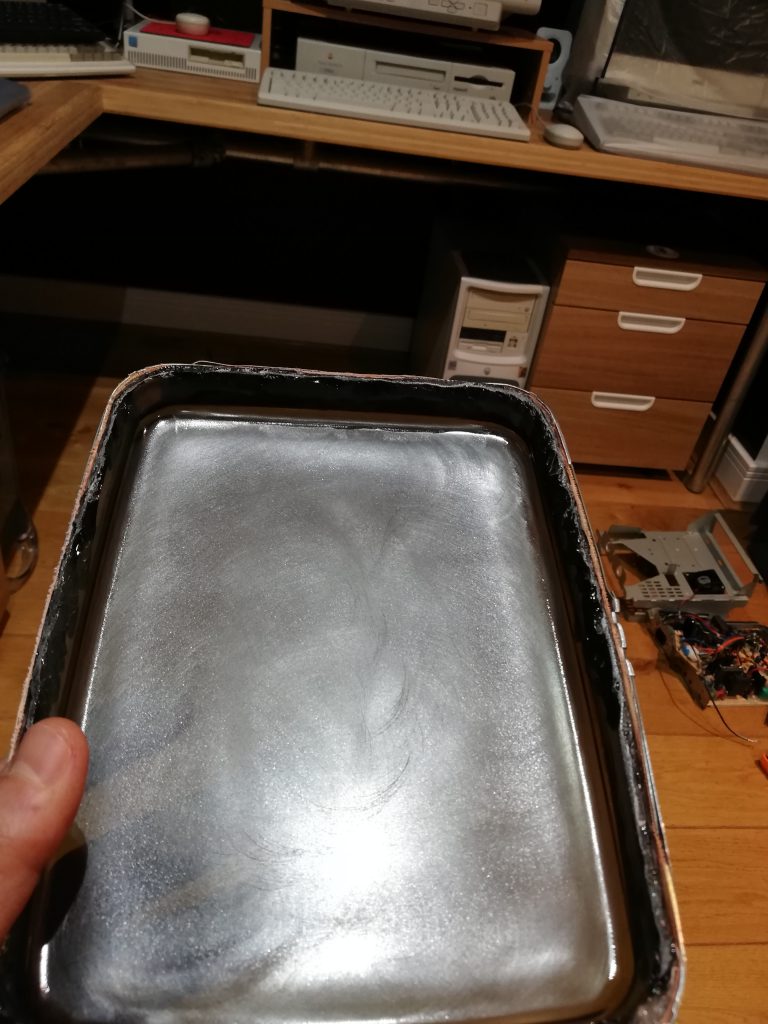
So, I decided to go for a project of transforming the Classic into a modern game / media station. But I wanted to keep the Macintosh Classic visual intact, so I wanted to use the CRT lens and add a LCD to the back of it. Below, you can see the CRT lens separated from the tube (I’ve used an angle grinder to cut it). There was a LOT of sanding and polishing afterwards, as the inside of the CRT lens is VERY rough surface – not see-through. I will detail the process later on.
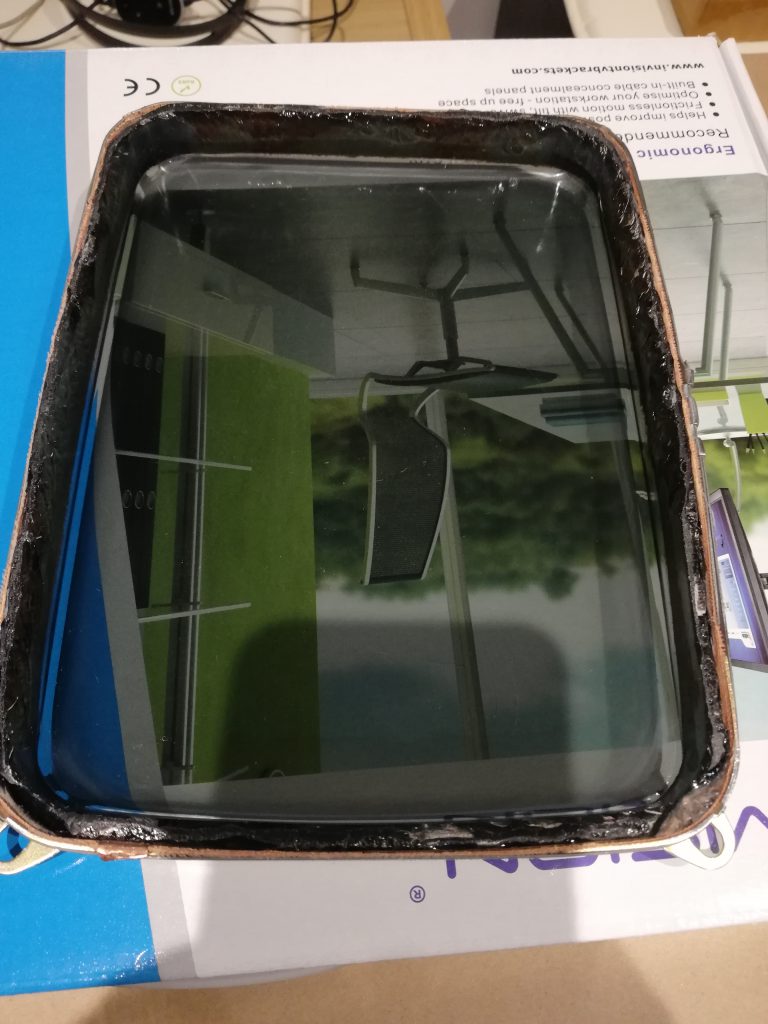
Below you can see the lens after the sanding / polishing job. Since the glass is very strong, it took me about 3 days to get to this stage. A lot of work!
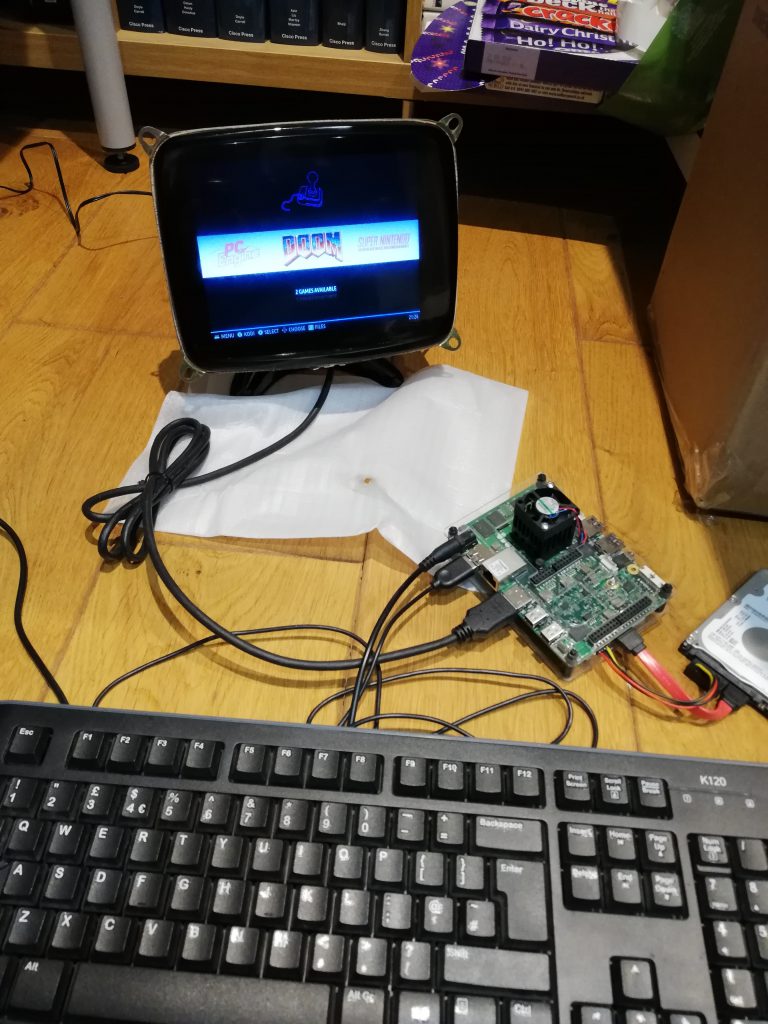
And down here you can see the test with the 8″ LCD display below it. Interested in knowing more about this project: Stay tuned!!